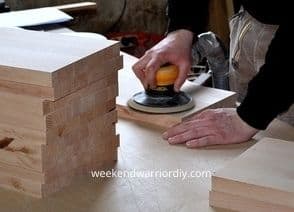
My favorite marking tools in my workshop are my carpenter pencils. I like how the thick lead makes marks on wood so much more noticeable than a standard pencil. Sure, I still use a regular pencil occasionally when I need a really fine point to mark some wood. After doing something like that, however, I always end up back to my carpenter pencil.
Carpenter pencils are made flat to prevent them from rolling away when placed down on the jobsite. Carpenter pencils contain more lead than standard pencils which means the tips are harder to break and the marks made are easier to locate. Since carpenter pencils are flat, it makes it easier for a carpenter to place the pencil between their ear and head for future use.
It sounds so obvious why a carpenter’s pencil is made flat, but surprisingly a lot of people have no idea why they are manufactured in this way. Carpenter’s pencils are rectangular in shape and much larger than a regular pencil. This makes a carpenter pencil much easier to work with. In this article, we will cover as much as possible on why they are flat and some other interesting tidbits of information.
Okay, let’s begin…
History of Carpenters Pencils
Pencils for carpenters have evolved to become the flat and rectangular pieces of equipment they are today. With the emergence of the industrial age, pencils (along with all kinds of other carpenter’s tools) were created and modified to meet the ever-changing needs of the consumer.
How is a Carpenter’s Pencil Made?
As with all pencils, the most common way they are manufactured is two pieces of wood with a groove big enough to hold a pre-molded lead. The lead is then placed in the groove then the wood is glued together completing the pencil.

Carpenter Pencil Dimensions
The common size of a carpenter’s pencil is ¼” x ½” by 7” to 7.5” long.
Just to compare, a regular pencil measure’s about ⅜” x ⅜” and 7.5” long.
How to Sharpen a Carpenter’s Pencil
Regular pencils are easy to sharpen because they are round in shape. They stick inside a sharpener which turns in a circular motion where the blades can cut the wood back to reveal the lead.
Carpenter pencils are rectangular therefore need to be sharpened in a different manner.
My sharpening tool of choice for these pencils is a utility knife.
- Taking a sharp utility knife, place the blade at a 45 to 30 degree angle about ⅜” from the end of the pencil you want sharpened.
- Cutting into the wood, shave/cut the wood with a motion towards the end of the pencil where you want to see the lead exposed doing your best not to cut into the lead.
- Turn the pencil over onto the other side and repeat.
- You might need to cut a bit of the wood away from the narrower edges as well.
That’s it! It’s very simple to get a carpenter’s pencil sharpened for use.
How Much Does a Carpenter Pencil Cost?
Luckily these pencils are cheap.
You can buy them in bundles for as cheap as $0.25 per pencil. I will link to some great deals on Amazon right here.
If you want the ease of just using a carpenter pencil without having to sharpen it all the time, then you should consider picking up a mechanical style pencil.
Mechanical carpenter pencils are about $5 to $10 a piece and the refills are somewhere around $6 for a pack. I recommend this one on Amazon to get you started.
What are the Different Types of Pencils?
There are many different types of pencils being manufactured and if you can’t find your carpenter’s pencil, why not try using one of these pencils until you get one.
Just for your reference, there are solid graphite pencils, liquid graphite pencils, charcoal pencils, carbon pencils, colored pencils, grease pencils, watercolor pencils, etc.

How to Remove Pencil Marks from Wood
Just a quick tip here since we are talking about pencils and marking wood. What happens if you mark up your wood with your new carpenter’s pencil then realize you don’t want those markings on the wood?
Well, with normal pencils you can go ahead and use the eraser on the other end. That’s a problem though with carpenter pencils as there typically isn’t an eraser on them.
You could use a separate eraser, but it won’t clear the marking away 100% and then there’s always the chance you might lose the small eraser.
A couple of products I recommend you try are denatured alcohol or acetone. With either product just use a rag dampening it with the liquid and wipe the pencil marks away in a circular motion.
Conclusion
As simple as this topic is, the importance of why a carpenter’s pencil is flat shouldn’t be forgotten. Just like with any tool in your toolbox, they were all manufactured with a specific purpose in mind.
Yes, it’s just a pencil but this pencil makes markings on wood after it was carefully marked so you can then cut it and build something incredible.
When you put your carpenter pencil down, you can rest assured it will still be in the same location when you need it again.
Thanks for reading and good luck with your future woodworking projects.