Woodworking stands as an enduring craft, offering individuals a canvas to fashion both aesthetically pleasing and utilitarian pieces from wood. Whether you’re a seasoned artisan with years of experience under your belt or a novice just embarking on your woodworking journey, the mastery of woodworking techniques serves as a cornerstone for attaining precision, accuracy, and efficiency in your creations.
In this all-encompassing guide, we embark on a journey through the bedrock of woodworking fundamentals, delving deep into the intricacies of techniques such as rip cuts, crosscuts, and advanced methods. By immersing ourselves in these foundational principles, we aim to equip you with the indispensable knowledge and skills necessary to not only navigate but excel in your woodworking endeavors.
Whether you aspire to craft intricate furniture pieces or undertake ambitious woodworking projects, this guide serves as your compass, guiding you toward mastery in the timeless art of woodworking.
Understanding Rip Cuts
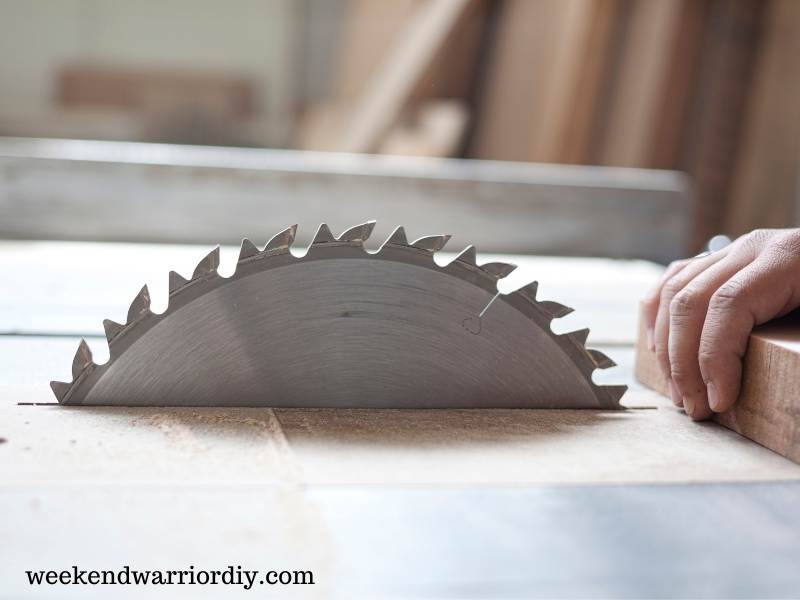
Rip cuts serve as foundational woodworking techniques, indispensable for cutting wood along the grain to produce long, parallel strips. To execute rip cuts effectively, it’s essential to have the right tools at your disposal, such as a table saw or a circular saw equipped with a rip fence. Follow these steps meticulously for precise rip cuts:
Measure and Mark
Commence by measuring and marking the desired width of the wood to be ripped. Utilize a pencil and a straight edge to create a clear guideline along the length of the board. Take your time to ensure accuracy, as precise marking is crucial for achieving the desired outcome.
Set the Rip Fence
Adjust the rip fence on your table saw or circular saw to align precisely with the marked guideline. It’s imperative to ensure that the fence is securely locked in place, as this guarantees consistency throughout the cut. Double-check the alignment to avoid any deviations that could compromise the integrity of the cut.
Safety Precautions
Prioritize safety above all else by donning appropriate protective gear, including safety glasses and hearing protection. Keep your hands at a safe distance from the blade at all times, maintaining a firm grip on the workpiece to prevent any accidental slips or mishaps. Remember, safety is paramount in woodworking, and adherence to safety protocols is non-negotiable.
Execute the Cut
With safety measures in place and the saw properly set up, it’s time to execute the cut. Turn on the saw and carefully guide the wood through the blade, ensuring that it remains pressed firmly against the rip fence throughout the cut. Maintain a steady pace and avoid rushing the process, as consistent pressure and movement are key to achieving a smooth and straight cut. Exercise caution and focus, allowing the saw to do the work while you maintain control over the wood. Once the cut is complete, switch off the saw and carefully remove the wood, taking care to avoid contact with the still-rotating blade.

Exploring Crosscuts
Crosscuts involve cutting wood across the grain, resulting in pieces of wood with varying lengths. To perform crosscuts accurately, you’ll need tools such as a miter saw or a circular saw equipped with a crosscut sled. Follow these steps for precise crosscuts:
Measure and Mark
Before making any cuts, it’s crucial to accurately determine the desired length of the wood piece. Utilize a pencil and a square to mark the wood according to your measurements. Take your time to ensure that the marking is not only visible but also precise, as even a slight deviation can lead to inaccuracies in the final cut.
Secure the Workpiece
Once the wood is marked, it’s essential to secure it firmly in place to prevent any movement during the cutting process. Utilize clamps or a vice to hold the wood securely against the work surface. This not only ensures safety by preventing potential kickbacks but also enhances accuracy by maintaining a consistent position throughout the cut.
Align the Blade
Before initiating the cut, it’s imperative to align the saw blade properly. Adjust the blade angle and depth on your saw to achieve the desired cut, whether it’s a straight cut, bevel cut, or angled cut. Ensure that the blade is perpendicular to the wood surface to avoid any unintended angled cuts that can compromise the integrity of the final piece.
Execute the Cut
With the wood securely held in place and the blade properly aligned, it’s time to execute the cut. Turn on the saw and carefully lower the blade onto the marked line, applying steady and even pressure. Maintain control of the saw as you guide it through the wood, ensuring a smooth and precise cut. Avoid rushing the process and focus on maintaining a consistent pace to achieve optimal results. Once the cut is complete, carefully remove the wood from the saw, taking care to avoid contact with the still-rotating blade.
Beyond Rip Cuts and Crosscuts: Advanced Techniques
While rip cuts and crosscuts form the foundation of woodworking, there are several advanced techniques that craftsmen can explore to elevate their projects:
Mitre Cuts
Mitre cuts are a staple in woodworking, involving the precise cutting of wood at an angle, typically set at 45 degrees. These angled cuts are indispensable for creating joints with complementary angles, essential in various woodworking applications such as framing, trim work, and furniture making. By seamlessly joining two pieces of wood at a 90-degree angle, mitre cuts contribute to the structural integrity and aesthetic appeal of the final product. Whether crafting picture frames or constructing intricate furniture pieces, mastering the art of mitre cuts is essential for achieving seamless joints and professional results.
Bevel Cuts
Bevel cuts are characterized by angled cuts made along the edge of the wood, resulting in a sloped surface. These versatile cuts serve a myriad of purposes in woodworking, ranging from creating decorative edges to forming chamfers and angled joints. By introducing bevel cuts, woodworkers can add dimension and visual interest to their projects, transforming ordinary surfaces into dynamic and captivating elements. Whether accentuating the edges of a tabletop or crafting intricate detailing on a cabinet door, mastering the technique of bevel cuts empowers woodworkers to unleash their creativity and elevate the aesthetic appeal of their creations.
Compound Cuts
Compound cuts represent the pinnacle of woodworking craftsmanship, combining both mitre and bevel angles to produce intricate shapes and joints. These complex cuts are indispensable in projects that demand sophisticated joinery, such as picture frames, crown molding, and decorative accents. By skillfully integrating multiple angles, compound cuts enable woodworkers to achieve seamless transitions and impeccable fitment, elevating the quality and visual impact of their work. While mastering compound cuts requires precision and attention to detail, the end result is a testament to the woodworker’s skill and dedication, culminating in breathtaking pieces that command admiration and awe.

Safety Measures in Woodworking
Safety should always be a top priority when working with power tools and sharp equipment. Here are some essential safety measures to follow:
Wear Protective Gear: Always wear safety glasses, hearing protection, and appropriate clothing to protect yourself from flying debris and loud noises.
Use Push Sticks and Guides: When operating saws, use push sticks and guides to keep your hands safely away from the blade while maintaining control over the workpiece.
Keep Work Area Clean and Organized: Clear clutter and debris from your work area to prevent tripping hazards and ensure smooth workflow.
Follow Manufacturer’s Guidelines: Read and understand the operating instructions and safety guidelines provided by the tool manufacturer before using any equipment.
Tips for Precision and Accuracy
Attaining precision and accuracy in woodworking cuts is pivotal for the creation of top-notch projects. Consider the following tips to elevate your precision:
Measure Twice, Cut Once: Take ample time to meticulously measure and mark the wood before executing any cuts. This extra precaution helps circumvent costly errors and ensures precise outcomes.
Maintain Sharp Blades: Guarantee that your saw blades remain sharp and well-kept to facilitate clean cuts with minimal tear-out. Dull blades not only compromise accuracy but also jeopardize the integrity of your workpiece.
Conduct Test Cuts: Prior to engaging in your main project, conduct test cuts on scrap wood. This practice allows you to fine-tune your equipment settings and verify calibration, paving the way for accurate cuts in your actual work.
Secure Workpiece Adequately: Always firmly secure the workpiece in place before commencing cutting operations. A stable workpiece minimizes the risk of shifting or vibrating during cutting, thereby averting inaccuracies in your cuts.
Common Mistakes to Avoid
Even seasoned woodworkers are prone to errors, but understanding and avoiding common missteps is crucial for a smoother woodworking journey:
Disregarding Safety Protocols: Overlooking safety precautions can pave the way for accidents and injuries. Prioritize safety above all when operating power tools to safeguard yourself and others.
Hastening Through Cuts: Patience is paramount for achieving precision. Rushing through cuts heightens the risk of inaccuracies and squandered materials. Take your time to ensure each cut is executed with care.
Neglecting Blade Care: A blunt or misaligned blade can yield uneven cuts and tear-out. Regularly assess and maintain your saw blades to uphold their efficiency and performance.
Failure to Plan: Lack of foresight in planning cuts and project layout often results in wasteful material usage. Dedicate sufficient time to strategize your cuts and optimize material utilization, minimizing unnecessary waste.
Practice Makes Perfect
Practice is the cornerstone of mastering woodworking techniques, demanding both perseverance and steadfast commitment. Integrate these invaluable tips into your woodworking regimen, embracing a mindset of perpetual learning and advancement. Through consistent application of time and effort, you will witness the gradual refinement of your skills and the emergence of unwavering confidence. Armed with determination and a hunger for improvement, you will soon find yourself equipped to conquer even the most formidable woodworking endeavors with grace and expertise.
Conclusion
Woodworking offers a deeply fulfilling pastime, empowering enthusiasts to express their ingenuity and craftsmanship freely. With a firm grasp of foundational woodworking skills like rip cuts, crosscuts, and advanced techniques, you gain the capacity to tackle diverse projects with finesse and assurance.
Emphasizing safety, maintaining a consistent practice regimen, and nurturing a perpetual hunger for learning and honing your craft are indispensable tenets on your woodworking journey. Stay vigilant, stay dedicated, and let your passion for woodworking continue to flourish and evolve.
Unique FAQs
What are some essential tools for woodworking beginners?
Essential tools for beginners include a circular saw, a power drill, a tape measure, a combination square, and safety gear such as safety glasses and hearing protection.
How can I improve my woodworking skills without access to expensive equipment?
Start by mastering basic hand tools such as hand saws, chisels, and planes. Focus on developing fundamental skills such as measuring, marking, and cutting by hand.
Is it necessary to have a dedicated workshop for woodworking?
While having a dedicated workshop is ideal, you can still pursue woodworking projects in a garage, basement, or even a small corner of your home with proper organization and planning.
What are some common mistakes beginners make when learning woodworking?
Common mistakes include rushing through cuts, neglecting safety precautions, using dull blades, and failing to plan projects adequately.
How can I overcome the fear of making mistakes in woodworking?
Embrace mistakes as learning opportunities and focus on continuous improvement. Start with simple projects and gradually challenge yourself as you gain confidence and experience.